The Planner organizes teachers’ Units, Assessments, and Journals in a Calendar view. No matter where teachers create units, journals, and assessments, they are automatically added to the Planner.
Creating units, assessments, lessons, and journals
The Planner provides the quickest way to create items. In the Class and Gradebook, teachers need to specify units and dates, but in the Planner, unit and date is selected by hovering over a date. Teachers can create multiple items for a day.
To create a Unit:
Hover to the left of the date, and click Click here to add unit
To add an Assessment:
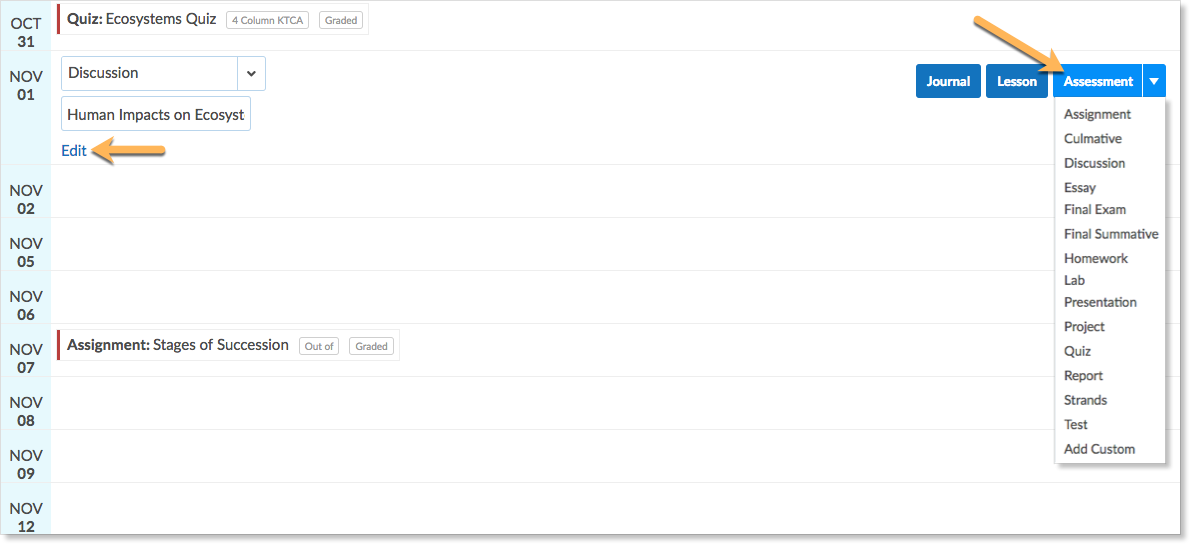
- Hover over a date and click Assessment.
- From the list, choose an assessment type.
- Enter a name. Teachers can enter additional information by clicking Edit.
Note: An assessment’s due date is based on the time zone the teacher creates the assessment in, not the student’s time zone, if it differs from the teacher. If a student is accessing content from a different time zone, ensure they are aware of this.
To add a Lesson:
- Hover over a date and click Lesson.
- Fill in the form as desired.
To add a Journal:
- Hover over a date and click Journal.
- Fill in the form as desired.
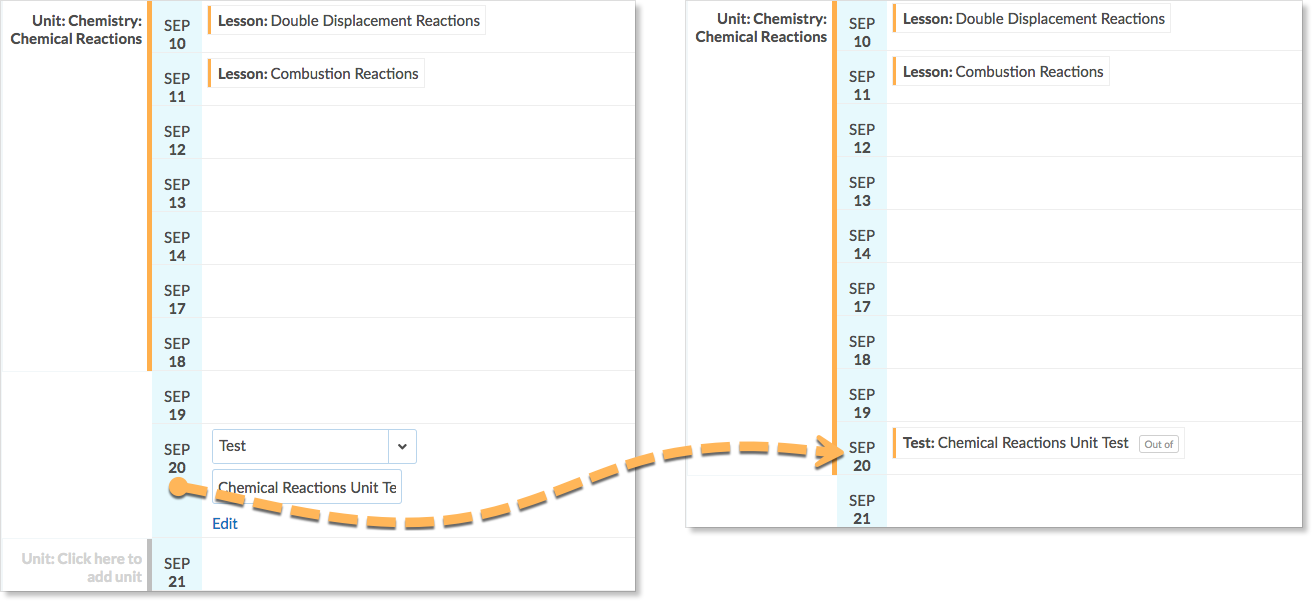
If a new item is created outside of, but close to a Unit, the unit will expand to include the new item. In this illustration, the teacher has added a test on January 23, a date that is not included in a Unit but close to a Unit. After the teacher has pressed Enter, the Unit expanded to include the Unit Test.
Optional assessment shortcuts
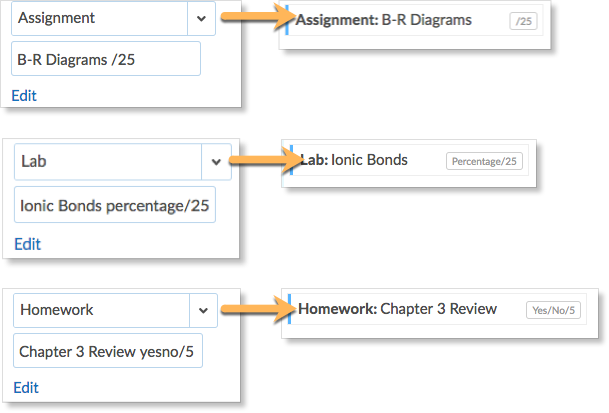
Teachers can create an assessment with a marking scheme and weighting points by entering keywords.
To do this:
- Enter the name of the assessment
- Followed by the marking scheme
- Then a slash followed by the weighting points
- Hit the Enter key or Tab key to create the assessment
This illustration shows the entries for creating an assessment with a marking scheme of:
- Out of, with weighting points of 25
- Percentage with weighting points of 25
- Yes/No weighting points of 5
Editing items
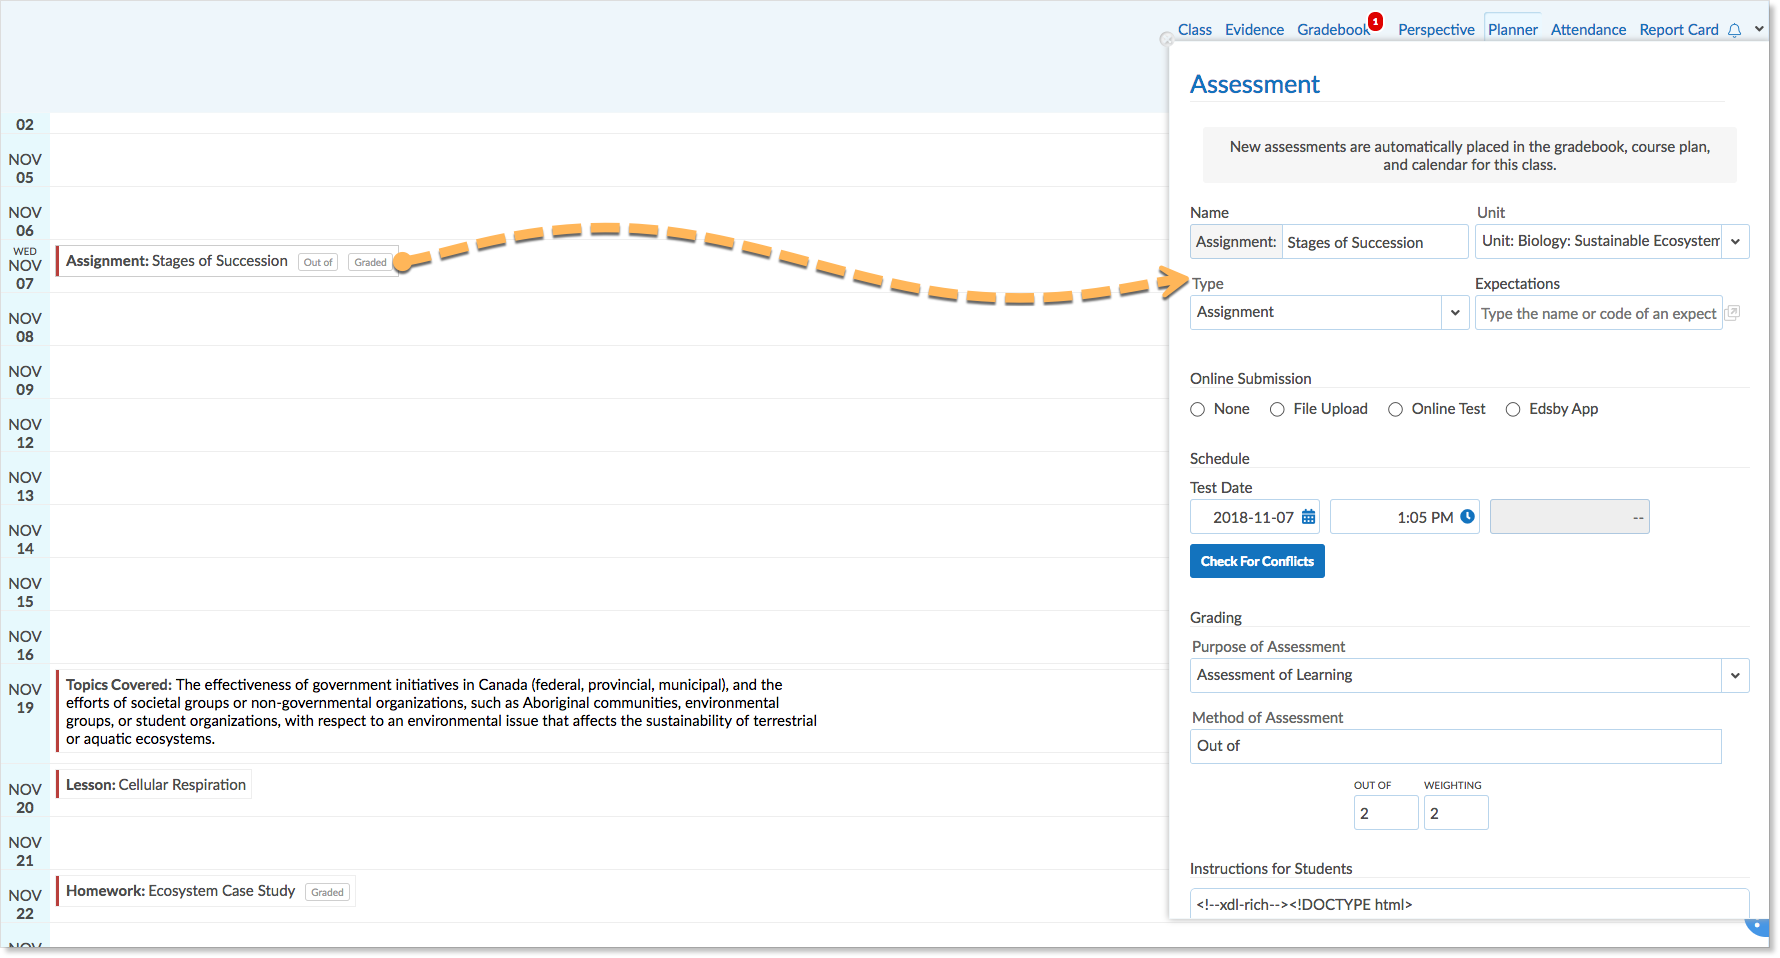
To edit any item in the Planner, click the name to open the form. After the changes have been made, click Save.
Making changes by dragging and dropping
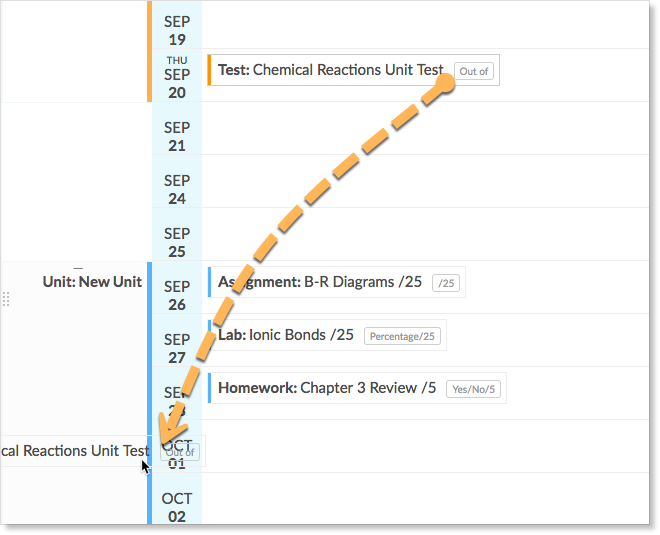
In addition to editing forms, teachers can change items by dragging and dropping.
To move a Unit and all items belonging to the Unit:
- Hover over the Unit name until the handle appears.
- Click, hold, and drag the Unit to the new date. Within the Unit, the new dates of the items are shown in dimmed text.
To expand a Unit:
- Hover over the Unit name until the handle and arrow appears.
- Drag the handle down to the desired date.
To move an assessment, lesson, or journal within a unit hover over the name and click, hold, and drag to the new date.
To move an assessment, lesson, or journal to another unit hover over the name and click, hold, and drag to the left side of the dates.
Planner badges
Filtering
The Planner displays every date the class is in session and every assessment, journal and Lesson.
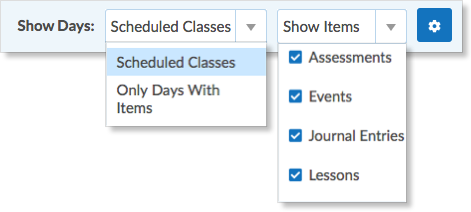
To filter the view to just dates with an item, select Only Days with Items from the Show Days drop-down menu.
Teachers can filter out assessments, journals, or lessons by unchecking the boxes next to them under the Show Items drop-down menu.
Advanced options
Clicking the Gear icon displays additional options that enable teachers to work with individual or groups of items in the Planner.
Additional options include the ability to:
- Select or deselect all the items in the class Planner
- Switch the status of items from visible to hidden
- Copy, cut, and delete items, including Units
To copy an item of content and paste it to another date in the Planner or to paste it to a different Class’ Planner, select the checkbox next to the item that appeared when clicking the gear icon. Click Copy.
To paste it, teachers can hover over a date in the Planner and click Paste.
The item will be pasted at the chosen date.
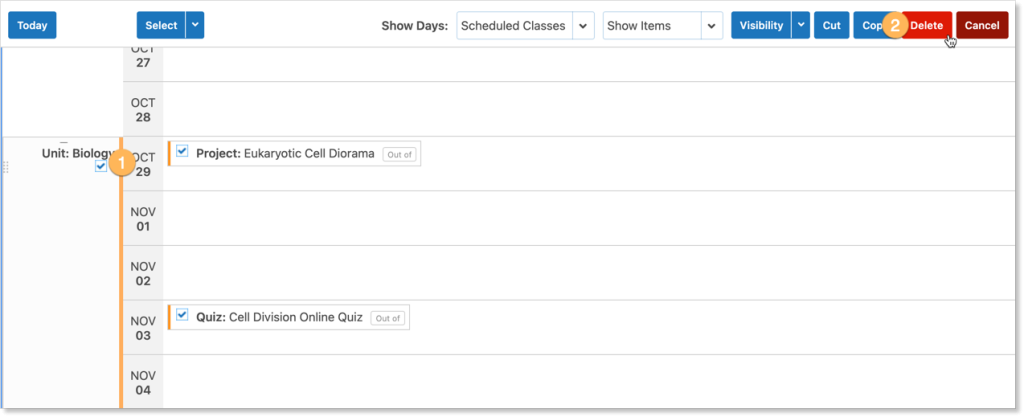
To delete the item from its previous location, select the checkbox again and click Delete.
Teachers can also move an item to a new location in the Planner by clicking Cut and Paste. This way, teachers do not need to delete the original item once they have pasted it to a new date.
Entire units can be deleted at once from the Planner. Select the checkbox below the unit name and click Delete.
Note: When deleting an entire unit, all content items within that unit will also be deleted.
To learn more about copying and reusing content from previous classes or to paste from one current class to another, click here.
For information on how the Planner integrates with the Content Builder, click here.


