The School Page, accessed from the top left of the Home Screen in Edsby, provides a great way for office administrators to share and manage a wide range of school-specific information including:
- Key Contacts of the school
- A list of Staff members in the school
- An Important section for policies and procedures
- School Groups for teams, clubs, staff members, etc.
- School News articles
- School Calendar
- School Information including its address, phone numbers, and fax numbers
- Documents such as newsletters, handbooks, or a school form
Note: This content is only available to authenticated individuals of a school, so office administrators can share more than they might choose to do on a public website.
Staff and Key Contacts
On the School Page, Edsby displays all staff members that are associated with the school. Edsby obtains this information from the Student Information System, so office administrators do not have to worry about manually inputting this information.
Staff are listed in one of two panels – a general Staff panel and the Key Contacts panel. Initially, all staff in the school are displayed in the Staff panel.
Individuals with school administrative privileges in Edsby (Principal or Office Head) can add staff to the Key Contacts panel. To do this, click on the word Staff to open a detailed list of staff members.
Then, hover over a staff member and click Add to Key Contacts.
To remove a staff member from the Key Contacts panel, hover over the staff member’s name and click Remove from Key Contacts.
To change the order of the people listed in the Key Contacts panel, click, hold, and drag a person’s name to the preferred location in the order.
Printing a Staff List
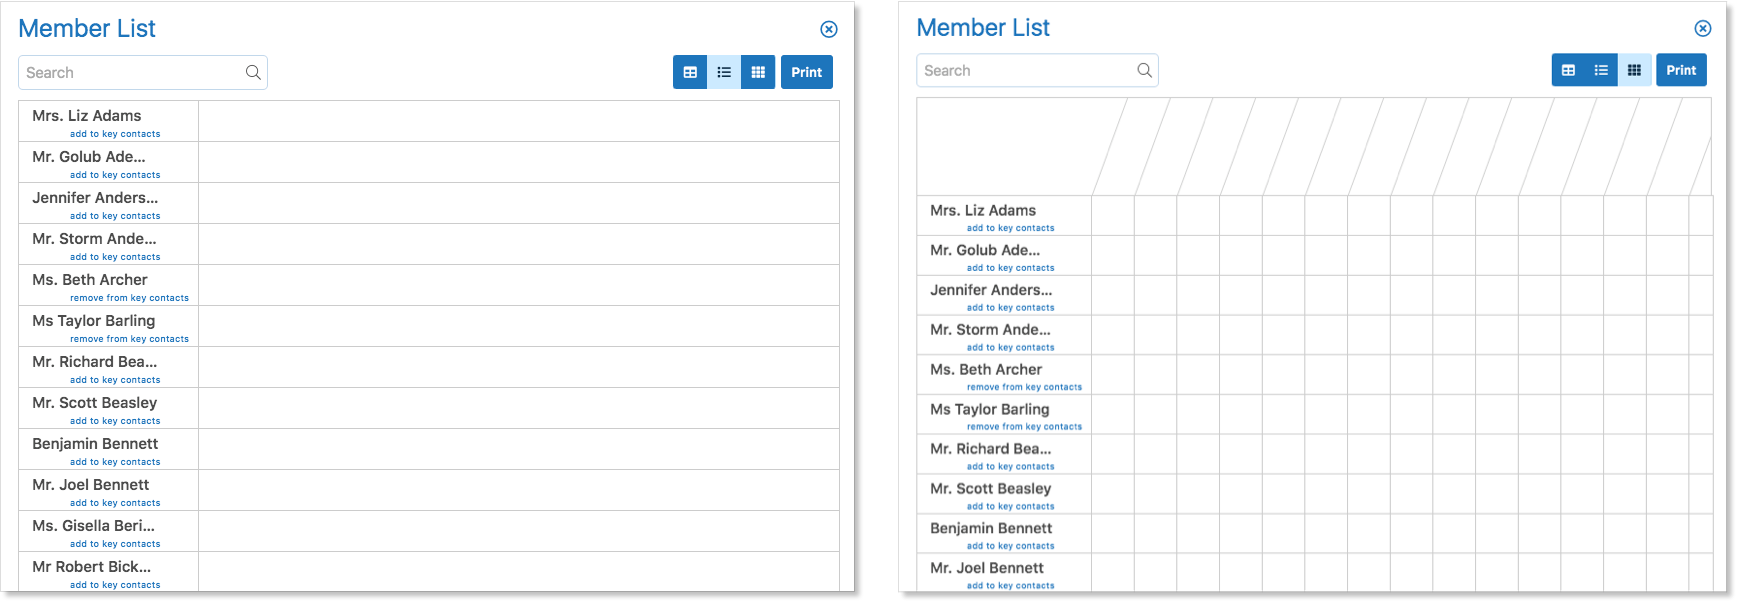
Edsby enables office administrators to print staff lists. To do this, click the Staff pop-out on the School Page.
Change the layout to one of two list views by clicking the icons at the top right of the pop-out.
When the desired layout has been chosen, click Print. The staff list will be printed.
Photos
Edsby can store and display a photograph for each staff member. It is highly recommended that each staff member has a good quality portrait photo in Edsby as it helps to make Edsby more inviting to students and parents. Other images, such as photos of pets, should be discouraged.
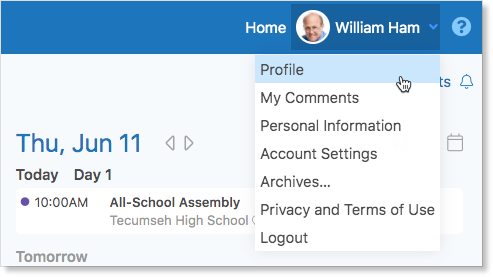
Staff members can easily add their photo to their profile. In the top right corner of Edsby, click the drop-down arrow. Select Profile.
Hover over the photo area, click Edit, and select a photo by clicking Browse. Click Save to update the photo.
Edsby also enables staff photos to be loaded in bulk if there is a complete set of professional photos of all staff members.
Roles
Edsby has a set of roles that control what each staff member can see and do in Edsby. Examples of roles include Principal, Teacher, Guidance, Office Head, IT Administrator, Support Staff, etc.
See the Appendix for the details about the various Staff Roles and Permissions. Ensure each staff member is assigned to the appropriate role.
Some Student Information Systems provide Edsby with a SIS role for each staff member and Edsby automatically maps them to an Edsby role. In this case, office administrators only need to verify the roles are correct. However, if Edsby is not provided with roles from the SIS, then it simply defaults all staff members to the role of Teacher. The IT Administrator should change the role of the staff members who are not teachers.
Note: The only role at a school that can change roles is the IT Administrator. Therefore, it is necessary that at least one person is assigned this role in the SIS.
Changing a staff member’s role can be done by navigating to the Staff Zoom or through the Staff pop-out on the School Page.
Select a specific staff member to open up the Teacher Details page.
Click Information. In the Role field, select the appropriate role. Click Save.
Important Panel
Edsby provides a panel on the School Page called Important. This enables access to a two-level page publishing system that can be used to publish information to the school community. It is ideal for things like policies and procedures, volunteer information, committee information, or a code of conduct.
The Important panel is organized into Topics and Subtopics, which can be used to easily add structure to the way administrators share information.
A Topic or Subtopic may simply be a line or two of plain text. However, Edsby provides a rich text editor that enables the creation of complex pages with tables, bullets, and embedded images. Take some time to explore what Edsby can do in this area!
Groups
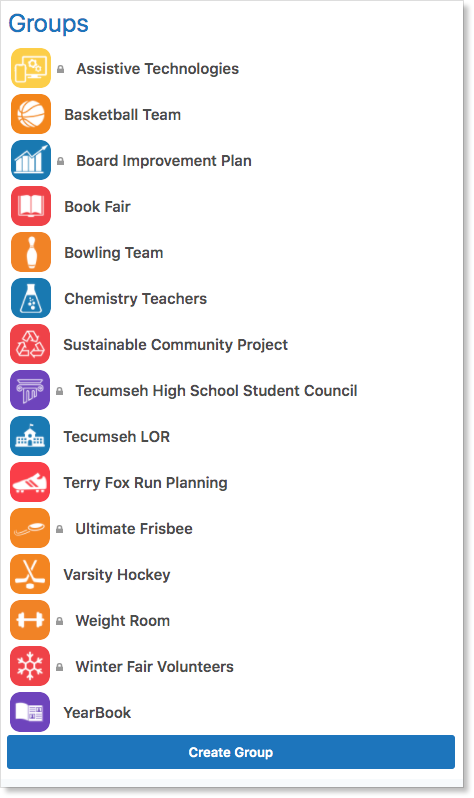
The school’s groups can be viewed on the School Page. These are the same groups visible when an individual clicks Find More in their My Groups panel.
Teachers and administrators can create groups from the School Page.
School News
The middle of the School Page shows a feed view of the school News. Here, administrators can create a new article or edit, approve, or delete existing News articles.
School Calendar
The School Calendar is used to create school-wide events. Holidays, Professional Development days, and school breaks are added automatically when Edsby is first set up. However, office administrators can add additional school-wide events easily through the Calendar on the School Page. These events will appear on everyone’s Home Screen Calendar in Edsby with a purple dot beside them.
Information Panel
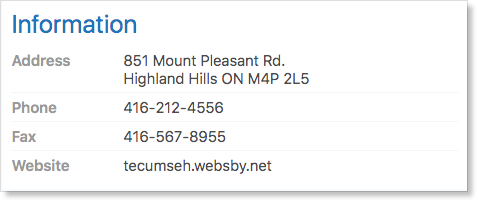
The Information panel on the School Page displays the school’s contact information including the address, phone number, fax number, and website.
This is available to all individuals associated with the school.
Clicking Information enables Administrators to supply or update the school information, change the school icon, and add additional moderators.
Documents Panel
Edsby provides a panel on the School Page called Documents. This provides a facility for storing files that students, teachers, and parents may need to access from time to time. Think of uploading standard forms (PDFs), school newsletters, the student handbook, or other files that may be useful to the school community.
Office administrators can create folders inside the Documents panel. If there are many files, it may be useful to organize them into folders. To add a folder, click New and select Folder.
Name the folder and click Save.
Files can be added to the folder by dragging and dropping.
School Report Card Comments
The School IT, Senior Admin, and Office (Head) roles can manage school-level report card comments in Edsby. These are managed by clicking the Comments link in the upper right corner of the School Page.
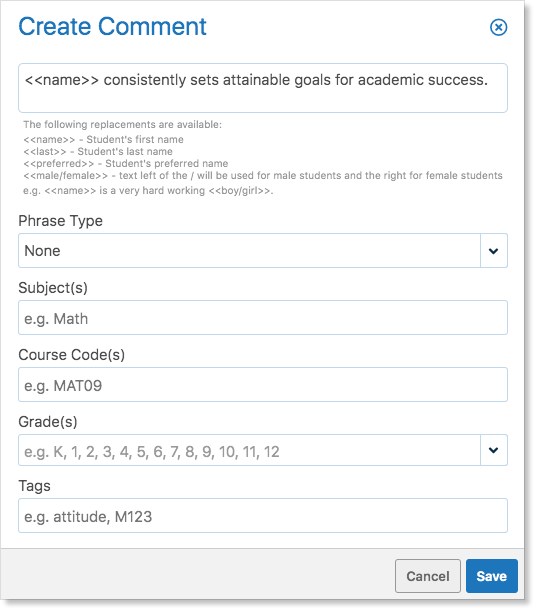
To create a comment, click Add New Comment.
Enter the comment in the text field. The comment can include automatic replacements. Click Save.
For more information on creating or importing report card comments in Edsby, click here.
School Notifications
Individuals associated with the school can choose to be notified whenever a new News article has been posted at the school by clicking the bell icon in the upper right corner of the School Page.
Appendix 1: Teacher and Staff Roles
Teachers and staff members have access to parent and student information but have limited access to the information of other staff members.
| Teacher | Teacher Assistant | Other Staff | Ancillary Staff | Office | |
| Zooms | My Students, My Parents, Classes (for Attendance only) | My Students, My Parents, Classes (for Attendance only) | None | None | Limited to Attendance, Staff, Students, Parents, Student Contacts |
| Attendance Administration | ✘No | ✘No | ✘No | ✘No | ✓Yes |
| Approval Forms | From My Students | From My Students | |||
| Student Profile | ✓Yes | ✓Yes | ✓Yes | ✓Yes | ✓Yes |
| Student Panorama and Portfolio | ✓Yes | ✓Yes | ✘No | ✘No | ✘No |
| Student Information Panel on Panorama | ✓Yes | ✓Yes* | ✘No | ✘No | ✘No |
| Student Mailbox | ✘No | ✘No | ✘No | ✘No | ✘No |
| Parent Profile | ✓Yes | ✓Yes | ✓Yes | ✓Yes | ✓Yes |
| Parent Details | ✓Yes | ✓Yes | ✘No | ✘No | ✘No |
| Parent Information | ✓Yes | ✓Yes | ✘No | ✘No | Contact information available on Attendance form |
| Staff Details | ✘No | ✘No | ✘No | ✘No | ✘No |
| Staff Profile | ✓Yes | ✓Yes | ✓Yes | ✓Yes | ✓Yes |
| Class Access | When listed as teacher | When listed as teacher | ✘No | ✘No | ✘No |
| Class Setup Form | Edit if Class owner | Edit if Class owner | ✘No | ✘No | ✘No |
| Group Creation | ✓Yes | ✓Yes | ✘No | ✘No | ✘No |
Appendix 2: School Administration Roles
School Administration roles have access to the school-level Zooms, Attendance, Report Cards, and Parent-Teacher Interview Schedules.
| Guidance Staff | Office (Head) | Senior Admin | School IT | |
| Zooms | Staff, Students, Parents, Contacts, Classes | All Zooms | All Zooms | All Zooms |
| Attendance Administration | ✘No | ✓Edit | ✓Edit | ✓Edit |
| School Page Administration | ✘No | ✓Edit | ✓Edit | ✓Edit |
| Calendar Administration | ✘No | ✓Edit | ✓Edit | ✓Edit |
| Report Card Administration | ✘No | ✓Edit | ✓Edit | ✓Edit |
| Parent-Teacher Interviews Administration | ✘No | ✓Edit | ✓Edit | ✓Edit |
| Approval Forms | All students | All students | All students | All students |
| Student Profile | ✓View | ✓View | ✓View | ✓View |
| Student Panorama and Portfolio | ✓Edit | ✓Edit | ✓Edit | ✓Edit |
| Student Information Panel on Panorama | ✓View | ✓Edit | ✓Edit | ✓Edit |
| Student Mailbox | ✓View | ✓View | ✓View | ✓View |
| Parent Profile | ✓View | ✓View | ✓View | ✓View |
| Parent Details | ✓View | ✓Edit | ✓Edit | ✓Edit |
| Parent Information | ✓View | ✓Edit | ✓Edit | ✓Edit |
| Staff Profile | ✓View | ✓View | ✓View | ✓View |
| Staff Details | ✘No | ✓View | ✓View | ✓Edit |
| Edit Staff Passwords | ✘No | ✘No | Yes, if no AD | Yes, if no AD |
| Class Access | Yes, no Gradebook access | Yes, no Gradebook access | Yes, no Gradebook access | Yes, no Gradebook access |
| Class Setup Form | ✘No access | ✓Edit | ✓Edit | ✓Edit |
| Group Administration | ✘No | ✓Yes | ✓Yes | ✓Yes |
| Group Creation | ✓Yes | ✓Yes | ✓Yes | ✓Yes |
| Group Automated Membership | ✘No | ✓Yes | ✓Yes | ✓Yes |


