Edsby provides support for badge groups. These groups support the awarding and tracking of certifications and badges for both students and staff. These groups are useful for a range of applications including tracking student accomplishments and staff professional development.
Badge groups can be configured to be open to members to collaborate in which provides a great way for the members to engage on the topic even after being awarded the badge.
A badge is granted to a person by a badge moderator or multiple moderators. Each badge has its own set of badge moderators.
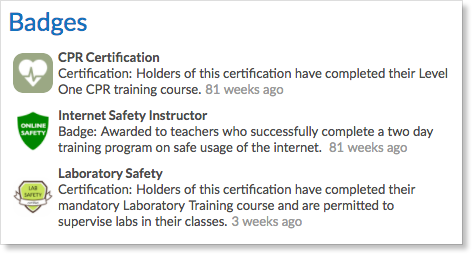
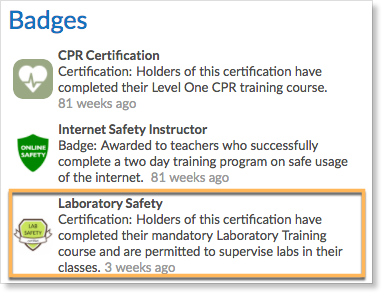
When someone is awarded a badge, it is added to their Badges panel located below the Applications panel on the Home Screen. Badges can have different categories, and each is labeled accordingly in the Badges Panel.
For example, Lab Safety is under the category Certification.
As soon as someone has one badge, the badges panel appears. If they are removed from the only badge group they are part of, the badges panel is removed from their home screen as well.
To enter the group, click the name of the badge in the panel.
Inside a badge group looks the same as a regular group with pinned items, a knowledge base, members panel, group schedule and a library. Additionally, members of the badge group can post notes and polls.
Creating a Badge Group
To create a badge group, click the pop-out in the My Groups panel or click Find More at the bottom of the My Groups panel. Click Create.
Set the group type to Badge. Name the group and enter a badge category, if desired. These will be visible in the Badges panel of all who have been awarded the badge.
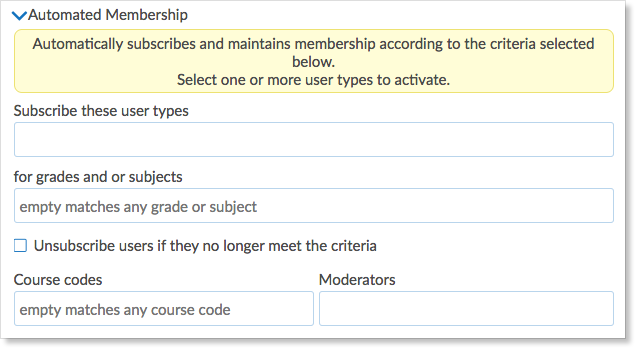
Select moderators, permissions and membership for the group. Automated membership can be used to ensure the necessary people are being awarded the right badges.
Once the setup form is complete, click Create Group. Creating a badge group automatically puts it in the Badges panel of the group moderator and anyone who has automatically been added to the group through automated membership.
Adding Members to a Badge Group
Moderators can choose to add members to the badge group both during group creation and after.
During group creation, moderators can choose to automatically add certain user types to the badge by specifying the Automated Membership settings. This will automatically add the badge to the Badges panel of those automatically added.
However, moderators can continue to add members to the group even after it has been created. Navigate to the group and click Invite from the top right corner of the group screen. Type the names of the people who will be added to the group. Click Add Members. Clicking this automatically adds the badge to the badges panel of those invited.
Integrating Badge and Professional Development Groups
Administrators may wish for their staff to complete necessary professional development. Upon completion of the professional development course, administrators may want to award staff with a badge.
In this example, William Ham, the principal of Tecumseh High has created a Professional Development group for all the science teachers at the school to complete necessary Laboratory Training prior to the start of the semester. He would also like to award teachers with a badge upon completion of the training. To do this, he will first create a new Badge group and then attach the badge to the setup form of the Professional Development group.
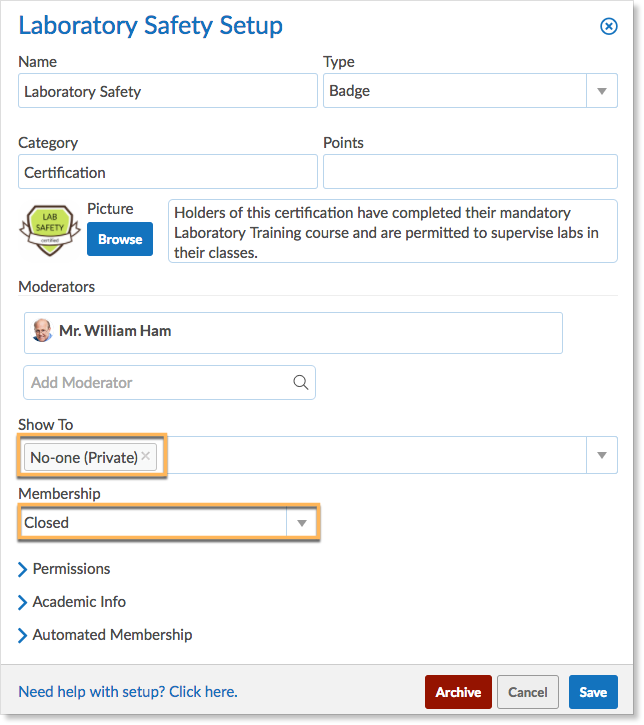
Create a new group. Select Badge for the group type. Enter a name for the badge. This will be visible in the Badges panel of all who have completed the training. Enter a category, if desired. Mr. Ham has specified this Laboratory safety badge as a certification. Enter a description of the badge. This will also be visible in the Badges panel.
Mr. Ham would like this to be a private group that is closed to all except those who have been specifically invited to it. In this case, it is not necessary for other teachers in the school to be able to search for the group or enter it.
Once the setup form is complete, click Create Group. This will add the badge to the Badges panel of Mr. Ham’s home screen.
Navigate to the setup form of the Professional Development group requiring the badge. In the setup form of the PD group you can select a badge for the group. The options for the badges are based on the badge groups that have been created at the school. Select the correct badge, in this case, Laboratory Safety.
Select whether the content in the PD Group will be marked complete manually or automatically. Staff will be awarded the badge in their Badges panel once they have 100% completed the content in the group.
Note: Badge and Professional Development Groups can also be created at the district level as well.
For more information about creating and using Professional Development Groups, click here.


